Running Veros on ERDA
ERDA
The Electronic Research Data Archive (ERDA) at the University of Copenhagen (KU/UCPH) is meant for storing, sharing, analyzing and archiving research data. ERDA delivers safe central storage space for private and shared files, interactive analysis tools, and data archiving for safe-keeping and publishing.
Getting started with ERDA’s Jupyter server
ERDA integrates a set of Jupyter services, which can be used to easily perform a wide range of data analysis and visualization tasks directly on your ERDA data. The system relies on the JupyterLab web interface to provide interactive Python notebooks or Linux command line access (Terminal) with direct and efficient access to your ERDA home directory. To get access to these services, ERDA provides a Jupyter button in the navigation menu.
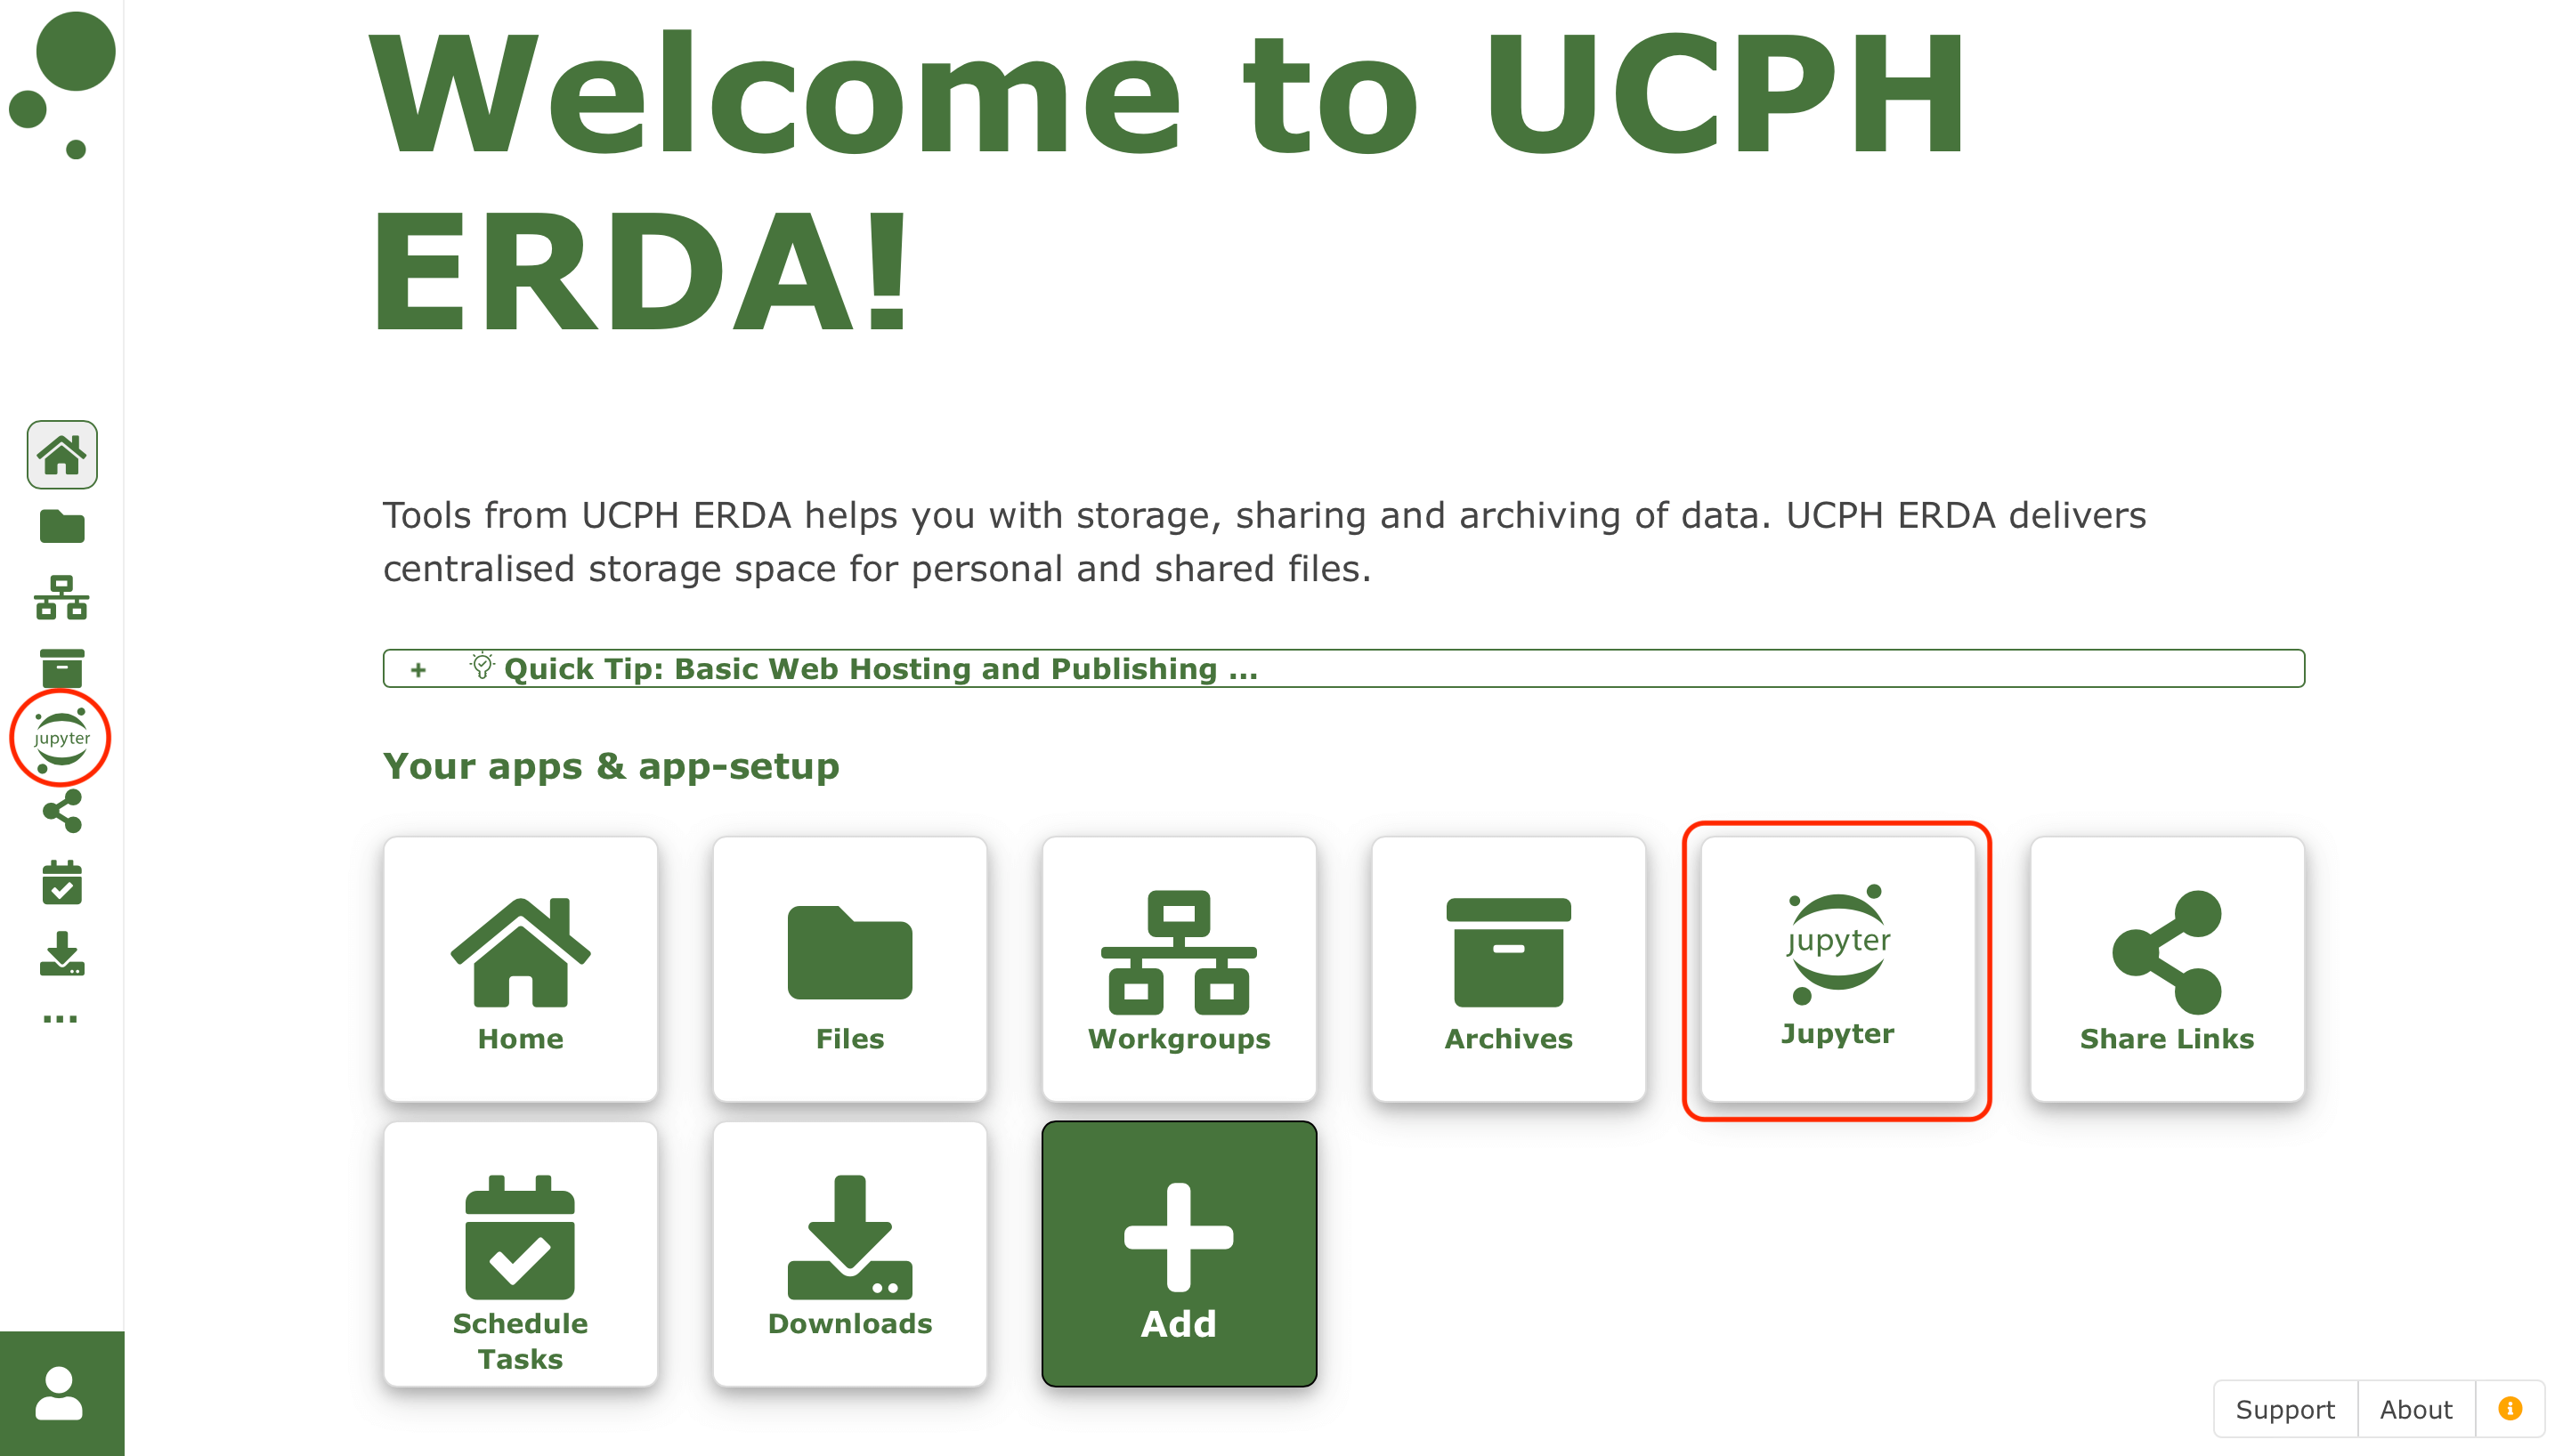
ERDA navigation menu.
Upon clicking it, the page to Select a Jupyter Service appears. On this page you are presented with a set of horizontal service tabs at the top, and each tab presents and describes the individual service and how it is configured in the Service Description.
Note
ERDA offers 2 services, DAG and MODI. MODI offers more powerful hardware, but you have to use a scheduling system to use it (see below). If you are unsure what to use, you should start with DAG.
Below the description there is a Start SERVICE button, which you can click to open a connection to that particular service in a new web browser tab or window.
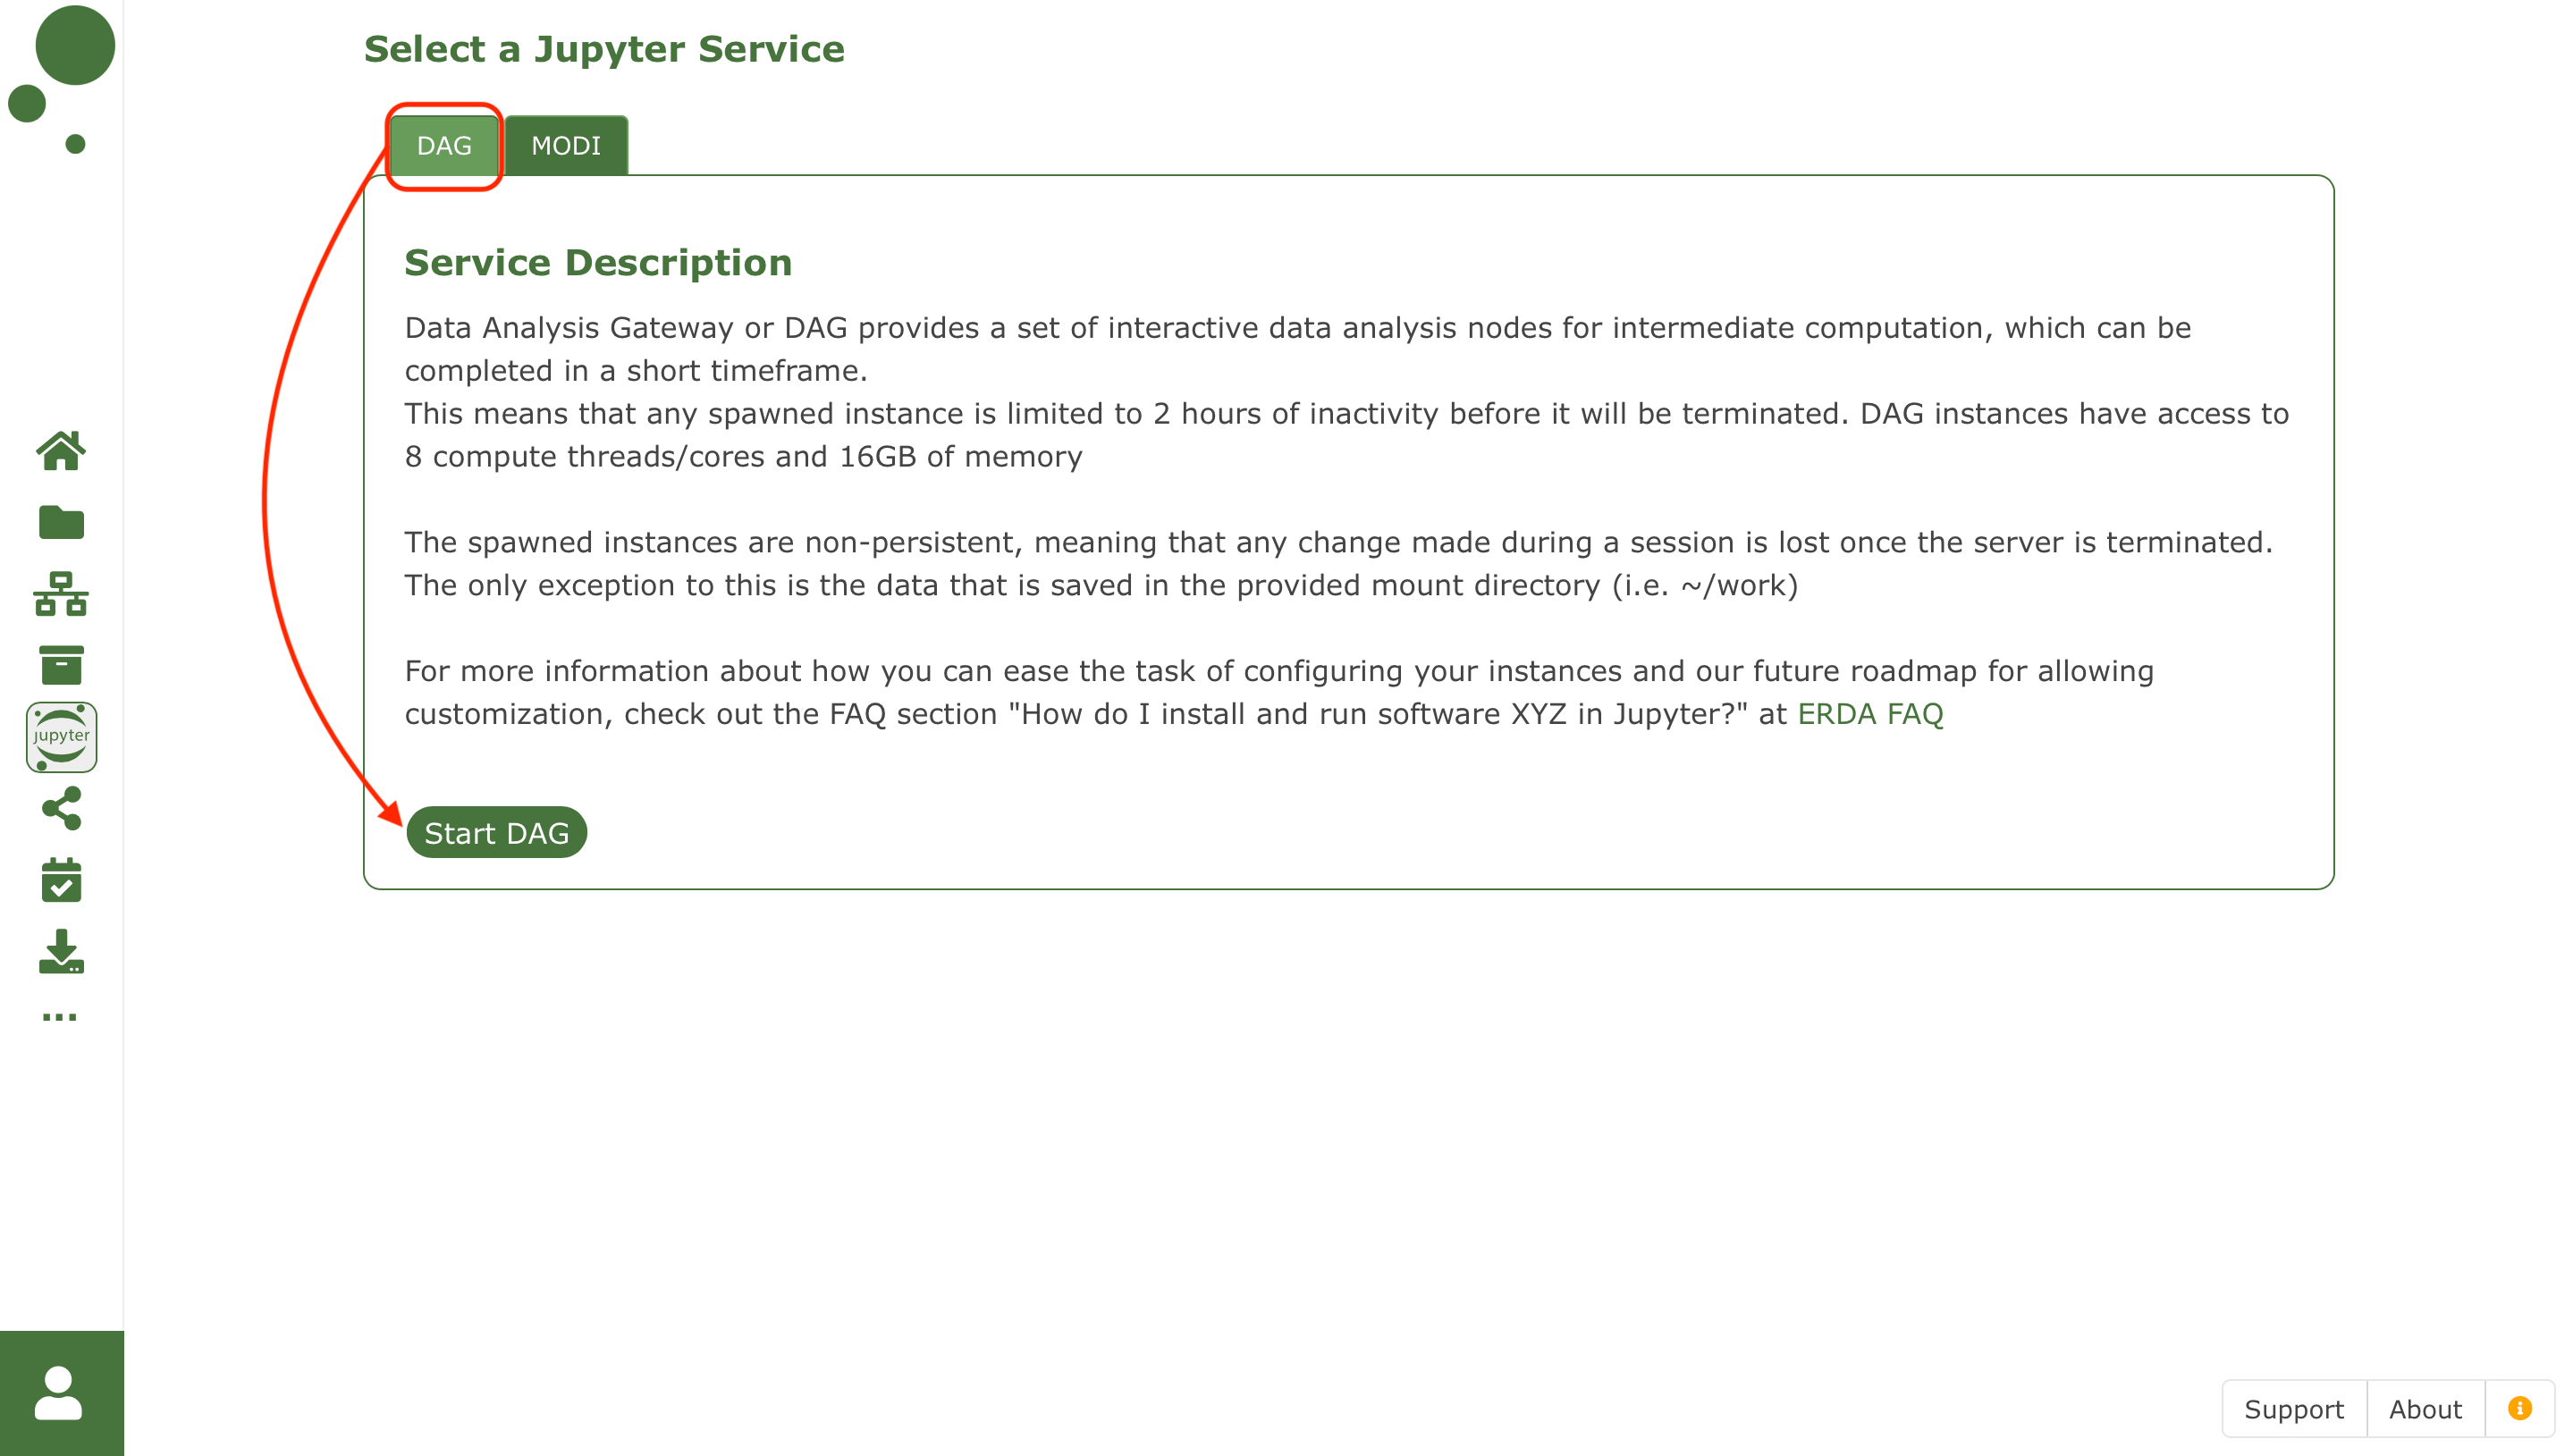
Select a Jupyter Service menu.
By default, it will take you to your personal home page on the Jupyter service as shown below, which is provided via a hosted version of JupyterHub. That is, the standard infrastructure to provide individual isolated Jupyter notebook containers to multiple users sharing a pool of actual compute nodes.

Top fragment of Jupyter service home page.
After clicking Start My Server, the site will give you an option to chose which notebook image you want to spawn. Select HPC Notebook as shown below and press the Start button.

Top fragment of Jupyter service home page with selected HPC Notebook image.
This will spawn the HPC Notebook image and redirect you straight to the JupyterLab interface as shown below. The JupyterLab interface is the same in all available Services (DAG and MODI).
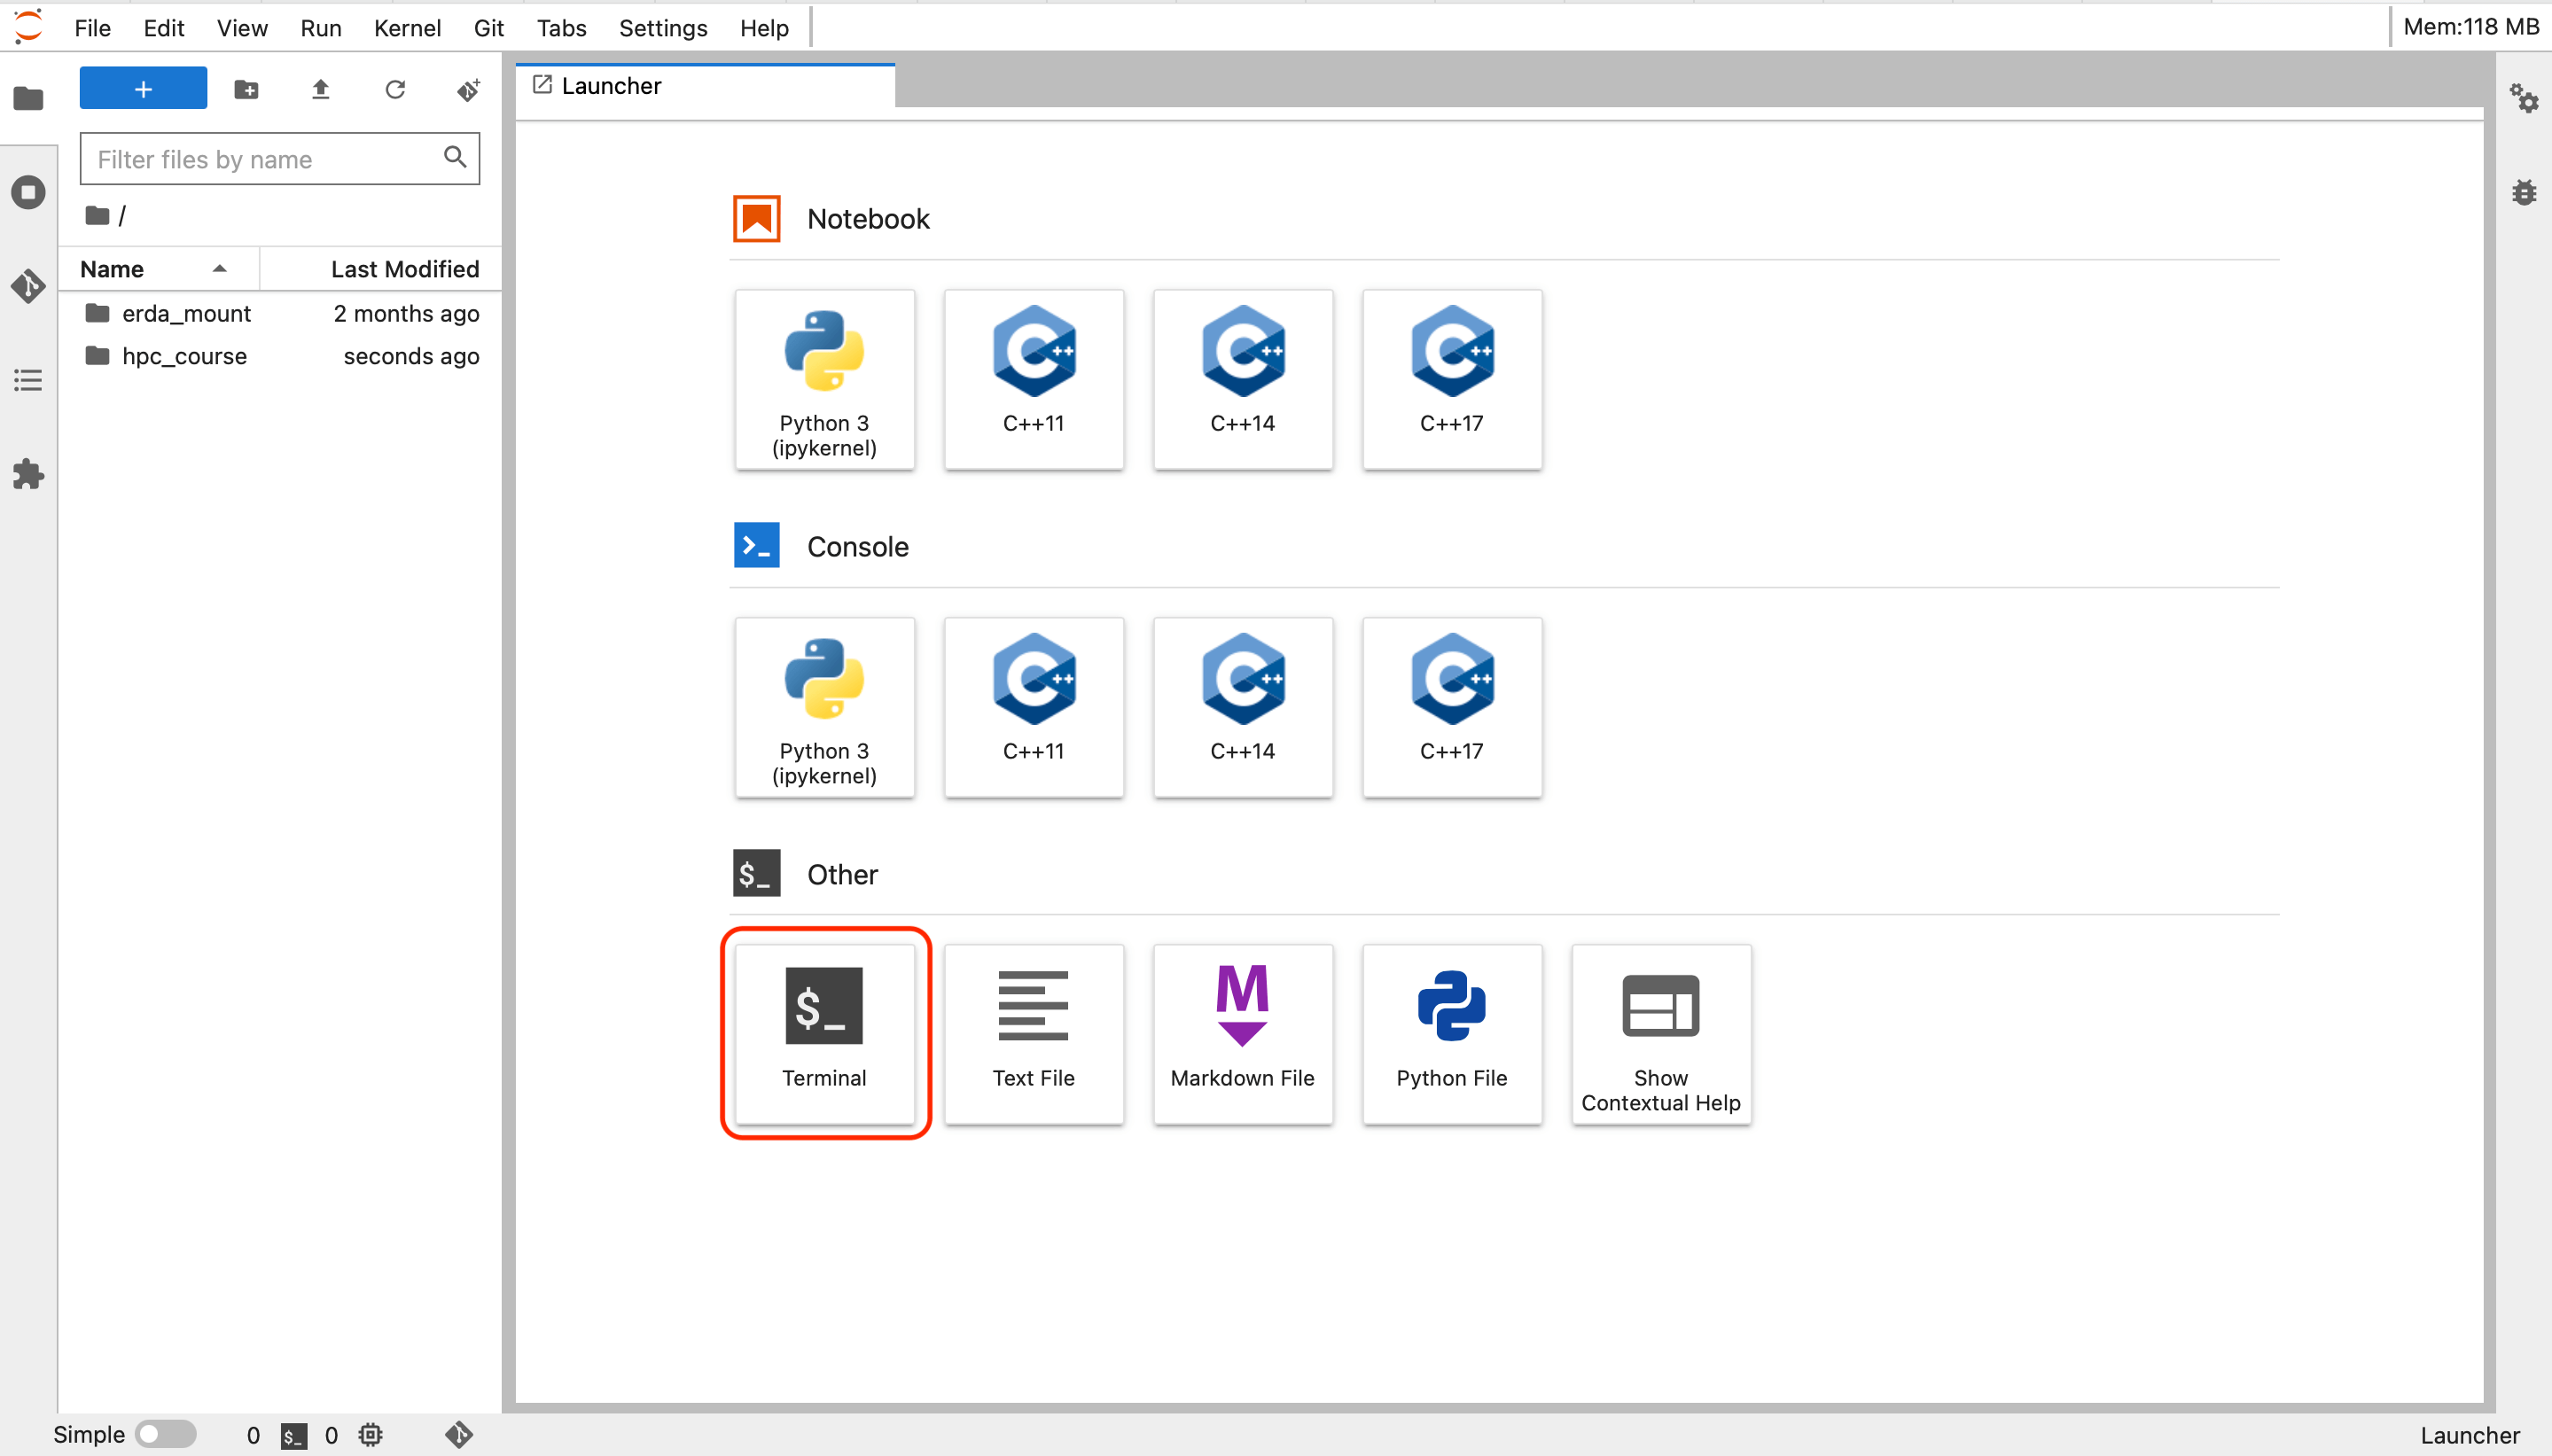
JupyterLab interface on DAG.
Follow the Veros installation instructions below with respect to the selected service.
Data Analysis Gateway (DAG)
In order to install Veros on a DAG instance do the following after launching the Terminal:
Clone the Veros repository:
$ cd ~/modi_mount
$ git clone https://github.com/team-ocean/veros.git -b v1.6.2
Change the current directory to the Veros root directory:
$ cd veros
Create a new conda environment for Veros, and install all relevant dependencies by running:
$ conda env create -f conda-environment.yml
To use Veros, activate your new conda environment via:
$ conda activate veros
Make a folder for your Veros setups, and switch to it:
$ mkdir ~/vs-setups
$ cd ~/vs-setups
Copy the global 4deg model template from the setup gallery:
$ veros copy-setup global_4deg
Change the current directory to the setup directory:
$ cd global_4deg/
One can modify model parameters with the JupyterLab editor. To do that you need to navigate to your setup directory in the JupyterLab file browser (left panel) of the JupyterLab interface and double-click the
global_4deg.pyfile (circled in red) as in the figure below
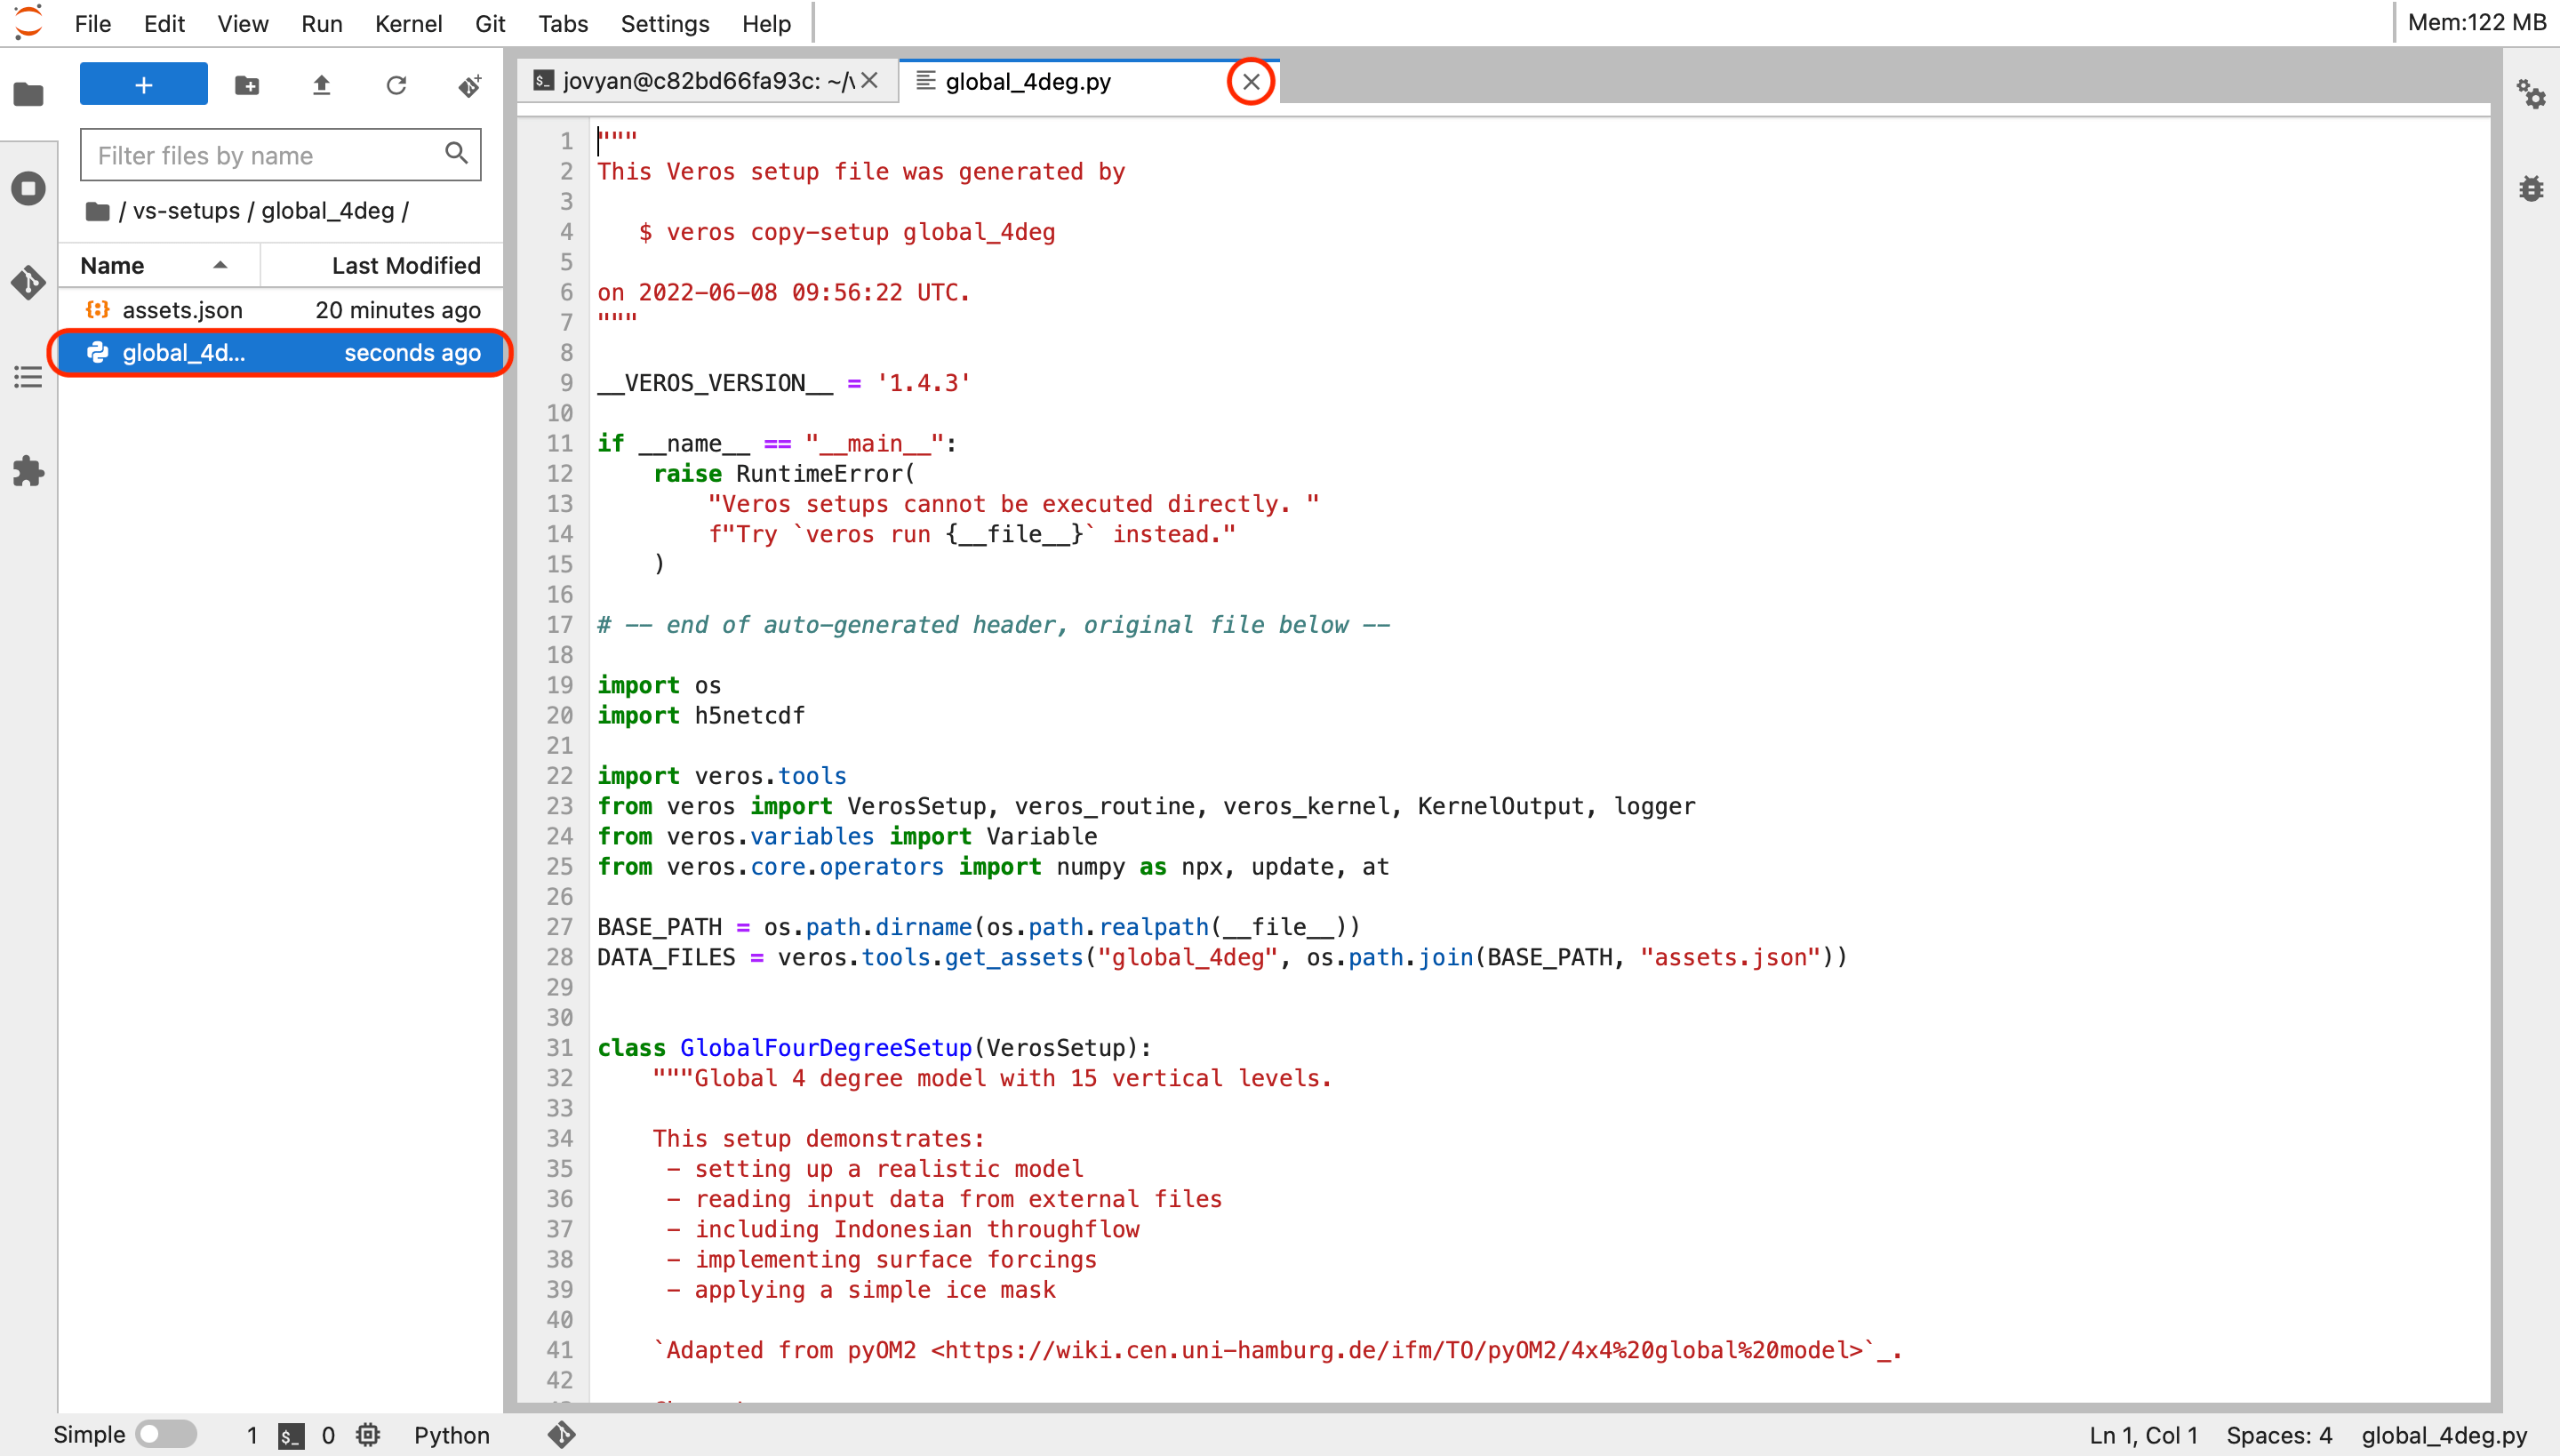
JupyterLab editor on DAG.
Press CTRL+S (CMD+S on MacOS) on a keyboard to save your changes and close the file by pressing the cross button (circled in red).
Run the model in serial mode on one CPU core:
$ veros run global_4deg.py
In case you want to run Veros in parallel mode, you need to reinstall the HDF5 library with parallel I/O support:
$ conda install "h5py=*=mpi_mpich*" --force-reinstall
To run the model in parallel mode on 4 CPU cores execute:
$ mpirun -np 4 veros run global_4deg.py -n 2 2
MPI Oriented Development and Investigation (MODI)
In order to install Veros with the veros-bgc biogeochemistry plugin start an Ocean HPC Notebook from the Jupyter service home page following the instructions above.
Launch the Terminal, change your current directory to ~/modi_mount and clone the Veros repository:
$ cd ~/modi_mount
$ git clone https://github.com/team-ocean/veros.git -b v1.6.2
Create a new conda environment for Veros:
$ conda create --prefix ~/modi_mount/conda-env-veros -y python=3.11
To use the new environment, activate it via:
$ conda activate ~/modi_mount/conda-env-veros
Install Veros, its biogeochemistry plugin and all relevant dependencies by running:
$ pip3 install ./veros
$ pip3 install veros-bgc
Copy the
bgc_global_4degmodel template from the setup gallery:$ veros copy-setup bgc_global_4deg
Change your current directory in the JupyterLab file browser (left panel) of the JupyterLab interface to ~/modi_mount by double-clicking the modi_mount folder (circled in red).
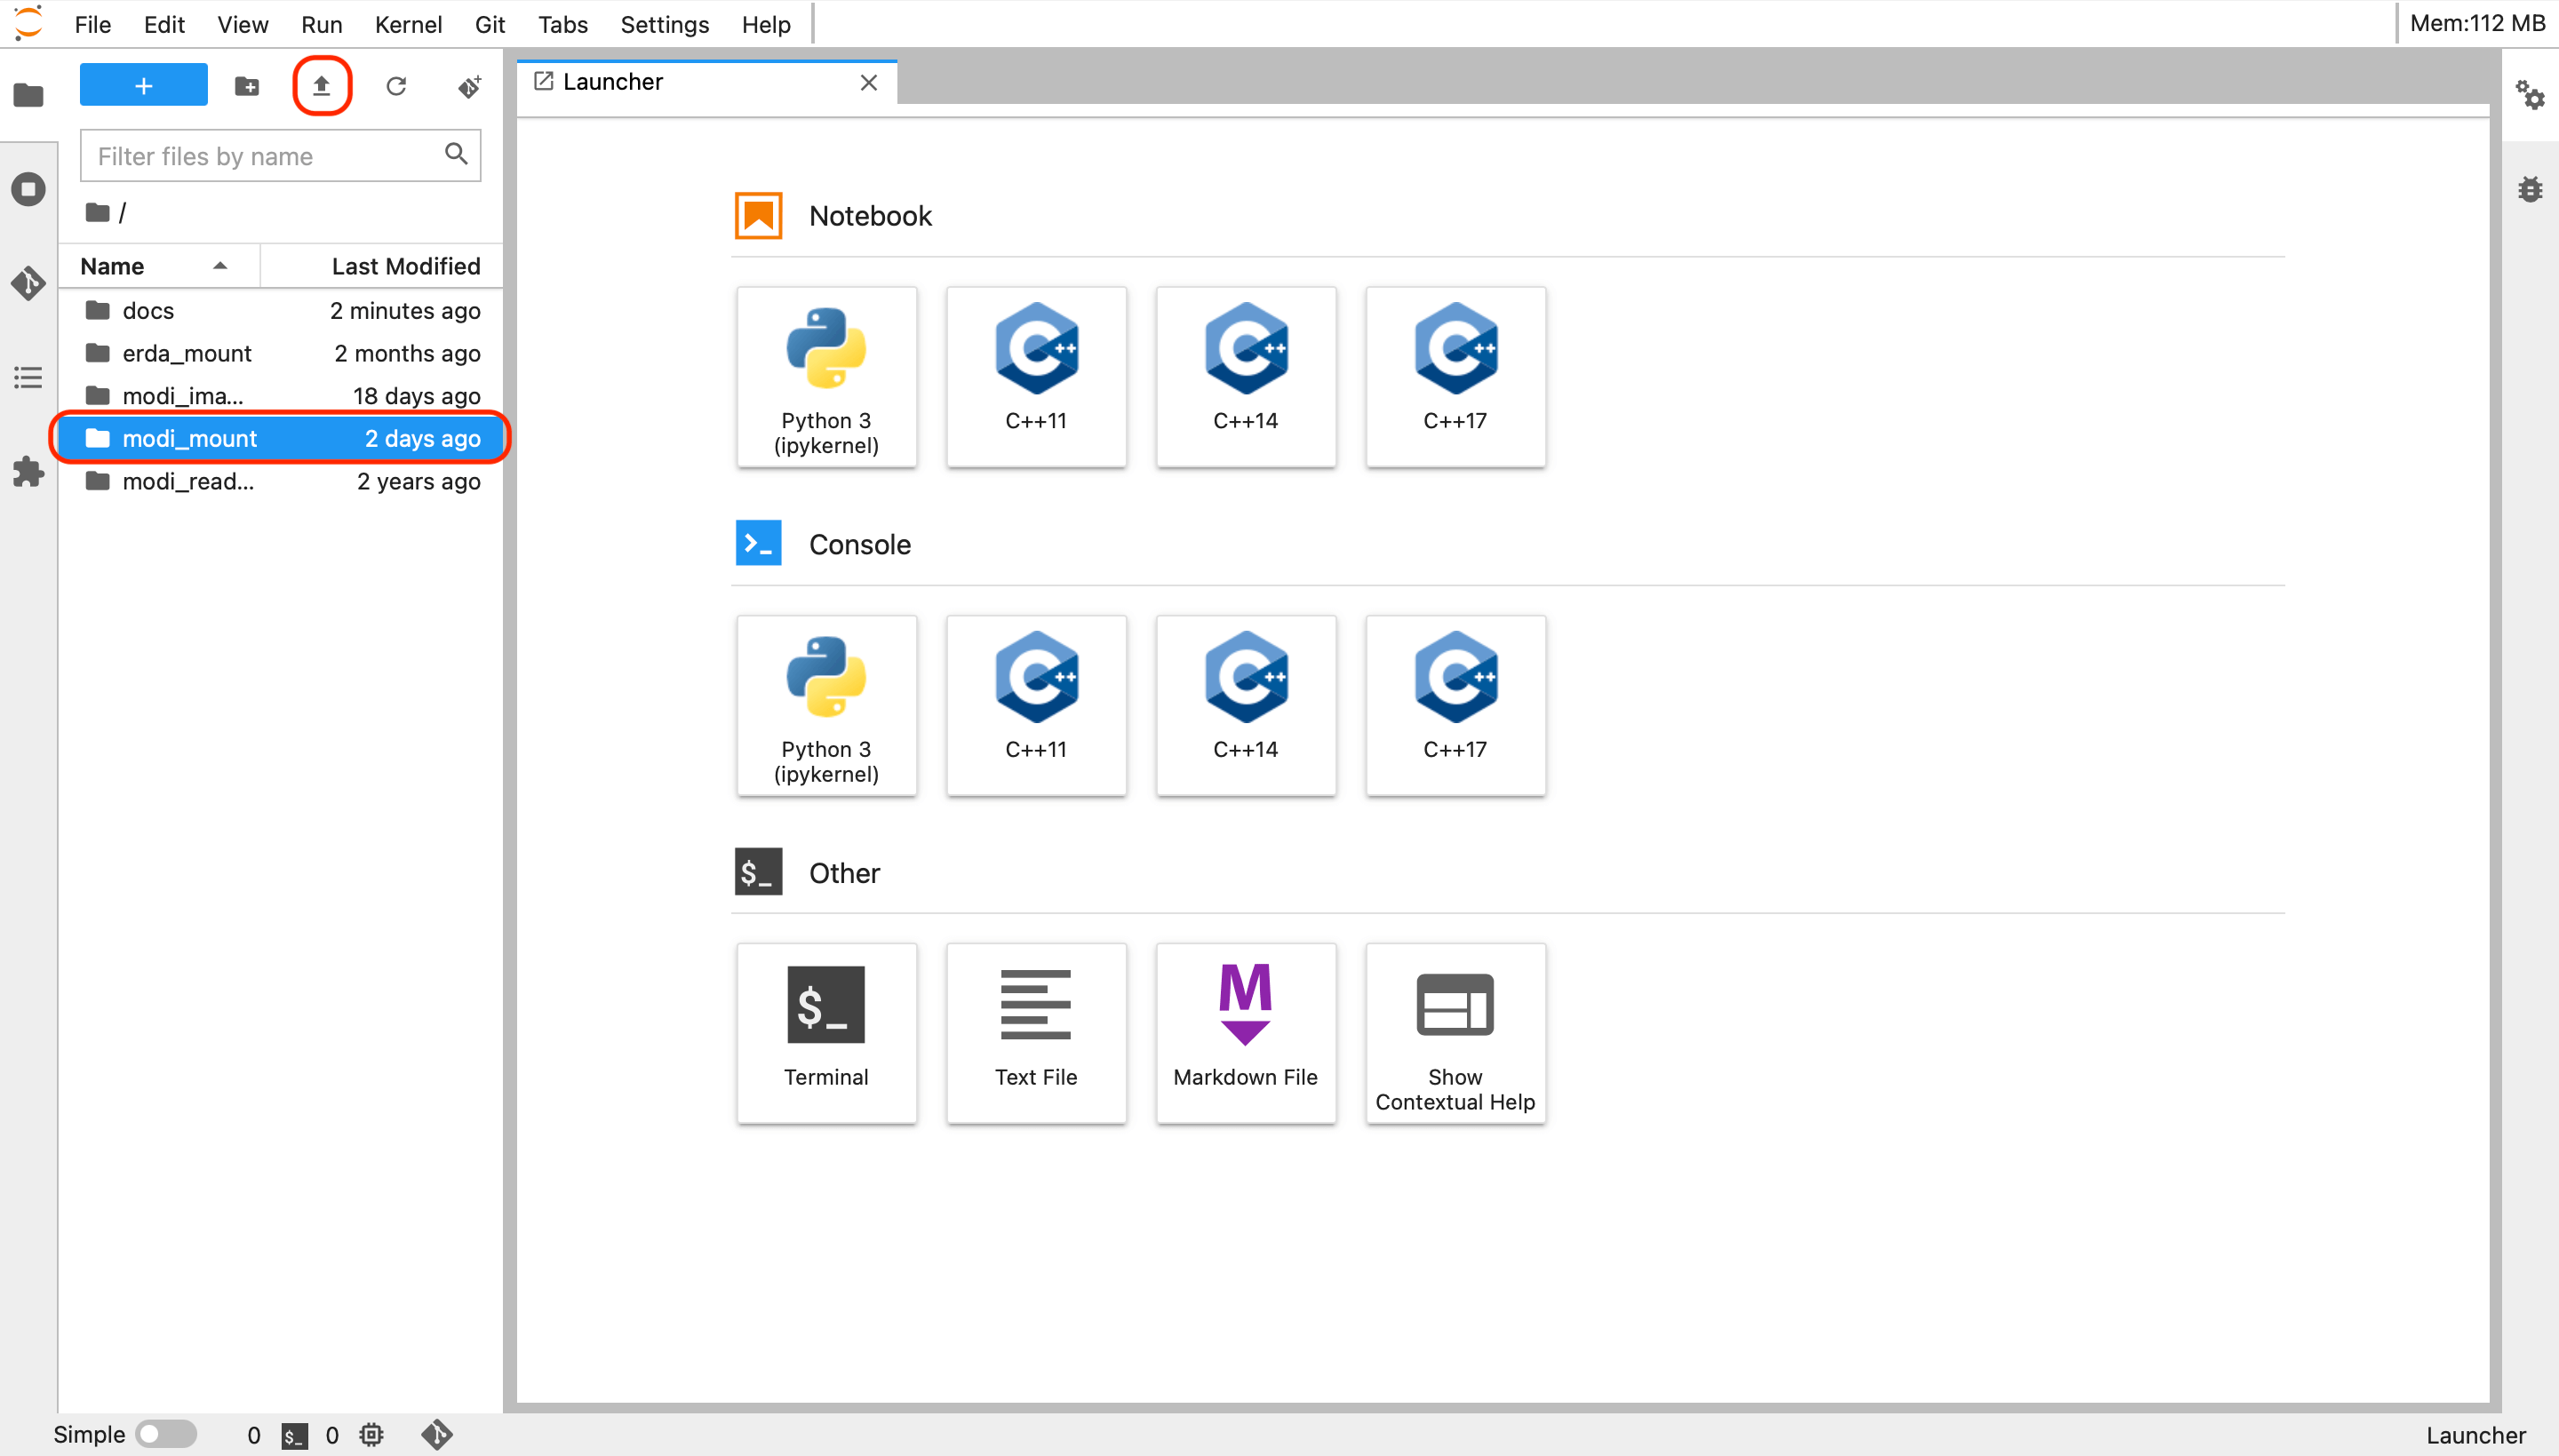
JupyterLab interface on MODI.
Download the
modi_veros_batch.shandmodi_veros_run.shscripts on your PC/Laptop and upload them to MODI (press circled in red arrow button as on the figure above).Navigate to your setup directory in the JupyterLab file browser and modify (if needed) the model parameters in the
bgc_global_four_degree.pyfile with the JupyterLab editor following the instructions above.To run your BGC setup submit a job to MODI’s Slurm queue:
$ sbatch ./modi_veros_batch.sh ~/modi_mount/bgc_global_4deg/bgc_global_four_degree.py
Note
It’s particularly important to run sbatch commands from the ~/modi_mount directory for jobs to succeed.
Slurm is an open source, fault-tolerant, and highly scalable cluster management and job scheduling system for large and small Linux clusters. There are a couple of basic Slurm commands that can be used to get an overview of the MODI cluster and manage your jobs, such as:
sinfo outputs the available partitions (modi_devel, modi_short, modi_long), their current availability (e.g. up or down), the maximum time a job can run before it is automatically terminated, the number of associated nodes and their individual state
$ spj483_ku_dk@848874c4e509:~$ sinfo
PARTITION   AVAIL  TIMELIMIT  NODES  STATE NODELIST
modi_devel*    up      15:00      1    mix modi004
modi_devel*    up      15:00      7   idle modi[000-003,005-007]
modi_short     up 2-00:00:00      1    mix modi004
modi_short     up 2-00:00:00      7   idle modi[000-003,005-007]
modi_long      up 7-00:00:00      1    mix modi004
modi_long      up 7-00:00:00      7   idle modi[000-003,005-007]
sbatch is used to submit a job (batch) script for later execution. The script will typically contain one or more srun commands to launch parallel tasks
$ spj483_ku_dk@848874c4e509:~/modi_mount$ sbatch submit.sh
Submitted batch job 10030
where 10030 is {JOBID}.
squeue shows queued jobs and their status, e.g. pending (PD) or running (R)
$ spj483_ku_dk@848874c4e509:~$ squeue
JOBID PARTITION     NAME     USER ST       TIME  NODES NODELIST(REASON)
10030 modi_shor veros_bg spj483_k  R       0:09      1 modi005
scancel cancels job allocation to release a node
$ scancel 10030